Introduction
Considering the switch from traditional inner tubes to tubeless? You’re not alone! Mountain bikers everywhere are debating which setup delivers the best grip, lowest rolling resistance, and easiest trail-side repairs. Tubeless is much easier to manage, I’ve noticed over long periods of time. I’m even considering switching over full-time myself as a tester.
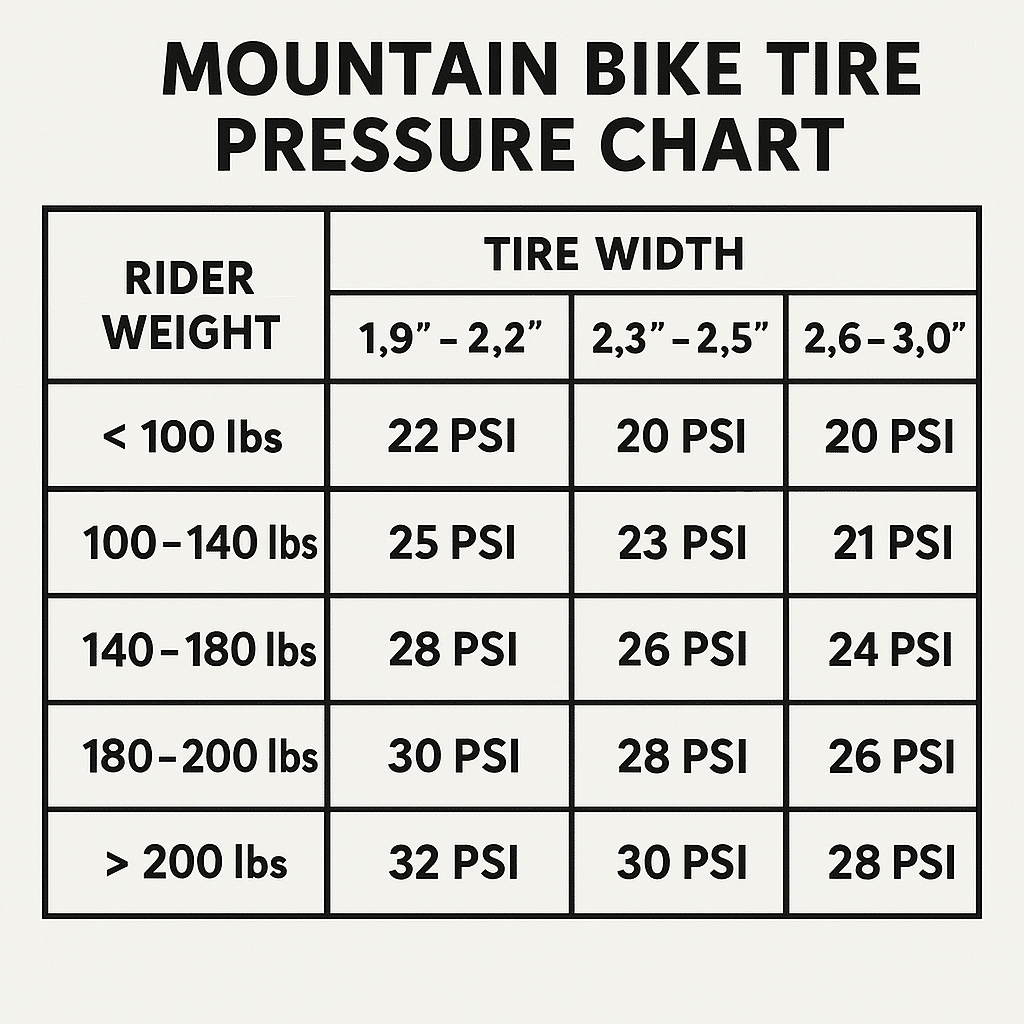
Plus, there are some benefits to having tubes, such as cost and considering that you can follow a mountain bike tire pressure chart.
In this guide, we’ll break down everything—cost, performance, and real-world maintenance—to think tubeless vs tube mtb and what is right for you.
What Is a Tube Setup? (Classic MTB Tires)
When I first started mountain biking, I didn’t know a thing about tubeless. My first bike came with a classic tube setup, and honestly, it’s still one of the simplest systems to understand. In fact I still use it, a tube setup means there’s an inner tube sitting inside your tire. That tube holds the air, while the outer tire provides traction and protection. Sounds basic, right? It is—and that’s the beauty of it.
How the Tube System Works
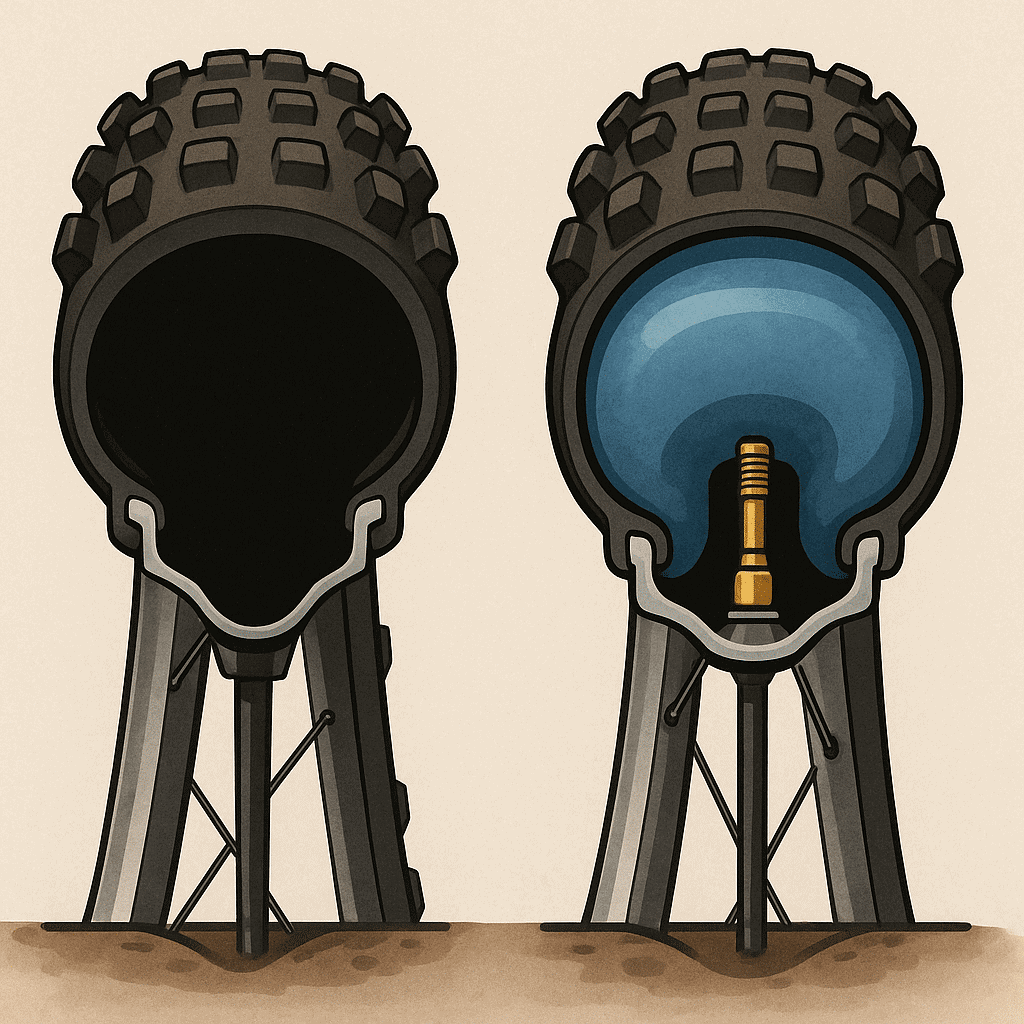
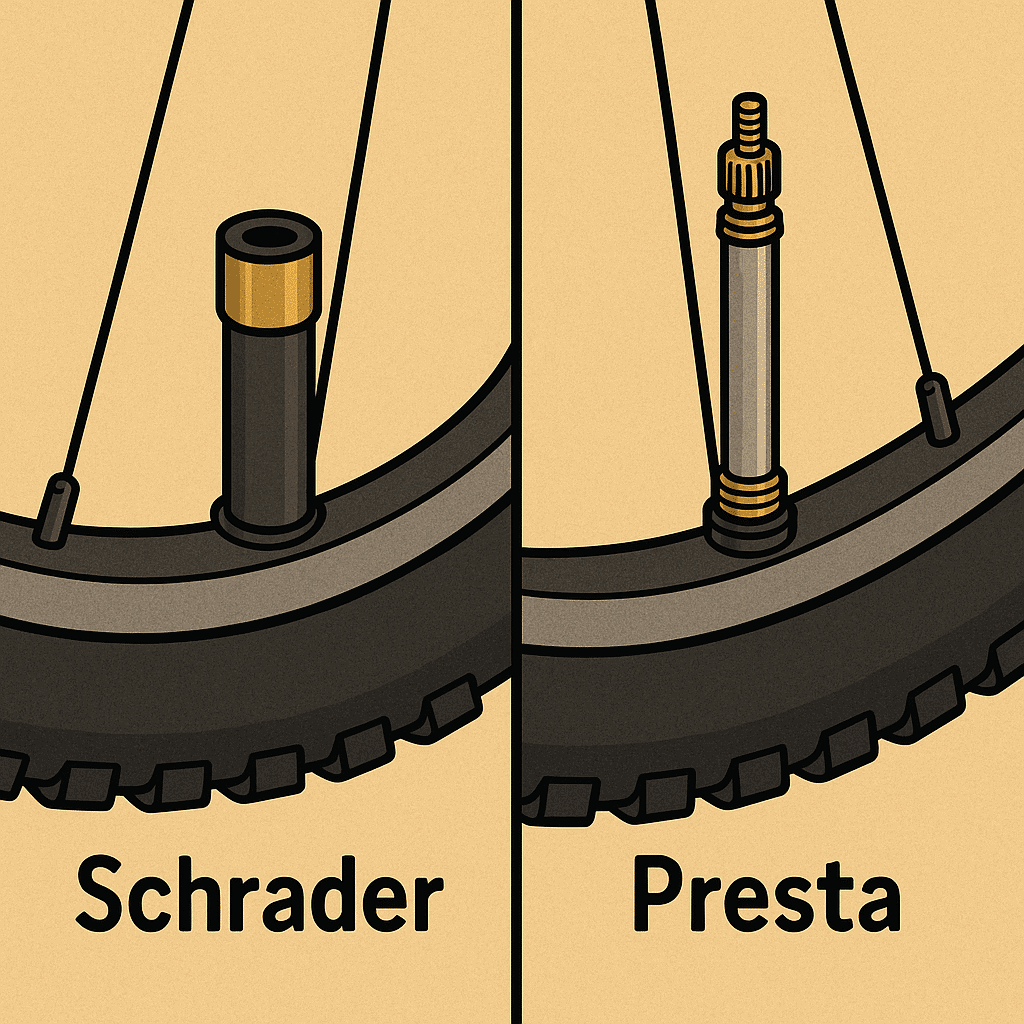
Inside the tire sits a rubber inner tube, kind of like a balloon. You inflate the tube through a valve (either Schrader or Presta) and it expands to push the tire outward against the rim. The pressure inside the tube keeps the tire seated on the rim and provides the cushion between your wheel and the trail. If you’ve ever patched a flat on a BMX bike or a commuter bike, it’s the same idea.
Advantages of Tubes
One of the biggest perks is easy installation. Pop a tube inside the tire, seat the bead, and pump it up—done. No sealant mess, no special rim tape, no struggling to get an airtight seal. I remember swapping a tube mid-ride on a rocky trail with nothing but a mini pump and a tire lever. Took me ten minutes tops, and I was back on the bike.
Cost is another win. A standard MTB tube might set you back only a few bucks, and they fit just about any rim or tire combo. That means if you’re riding older wheels or a hand-me-down bike, you don’t need to upgrade anything to stay rolling.
Common Issues and Frustrations
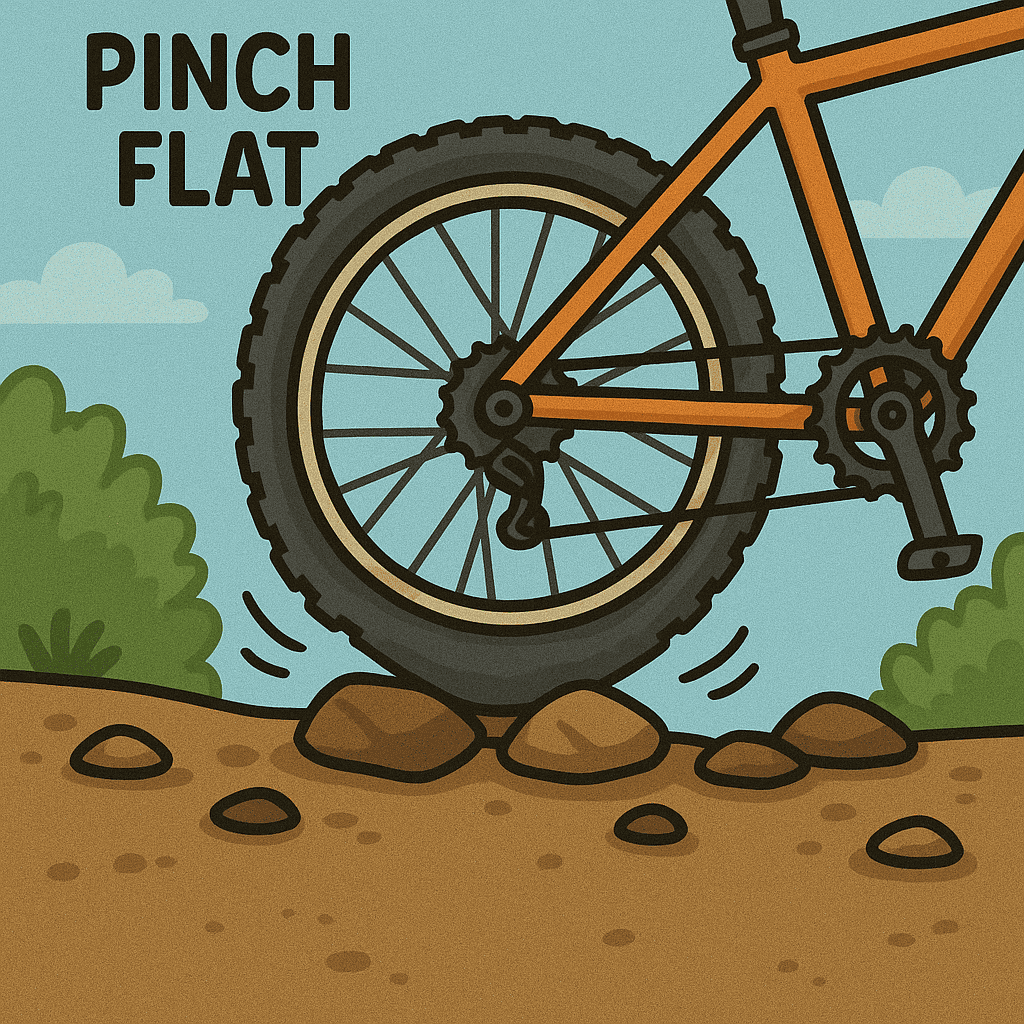
Of course, nothing’s perfect. Tubes are notorious for pinch flats—that dreaded “snakebite” where the rim compresses the tube against a rock or root and puts two tiny holes in it. I’ve had rides ruined because I was running pressure too low and hit a sharp edge. To avoid pinch flats, most riders keep the PSI higher (think 30–40 PSI depending on weight and terrain). But higher pressure can make the ride feel harsh and decrease traction on loose trails.
Another annoyance is the extra weight. A tube adds a few grams compared to a tubeless setup, which can matter if you’re chasing every second on climbs.
Takeaway Tips
If you’re a beginner or riding mostly smooth trails, a tube setup is still a solid, budget-friendly choice. Carry a spare tube and a patch kit, and you can handle almost any trail-side repair. Just remember to check your tire pressure before every ride and keep it on the higher side to reduce pinch flats. And if you start dreaming about lower PSI for better grip, that might be your sign to start exploring tubeless.
What Is a Tubeless Setup? (Modern Performance Choice)
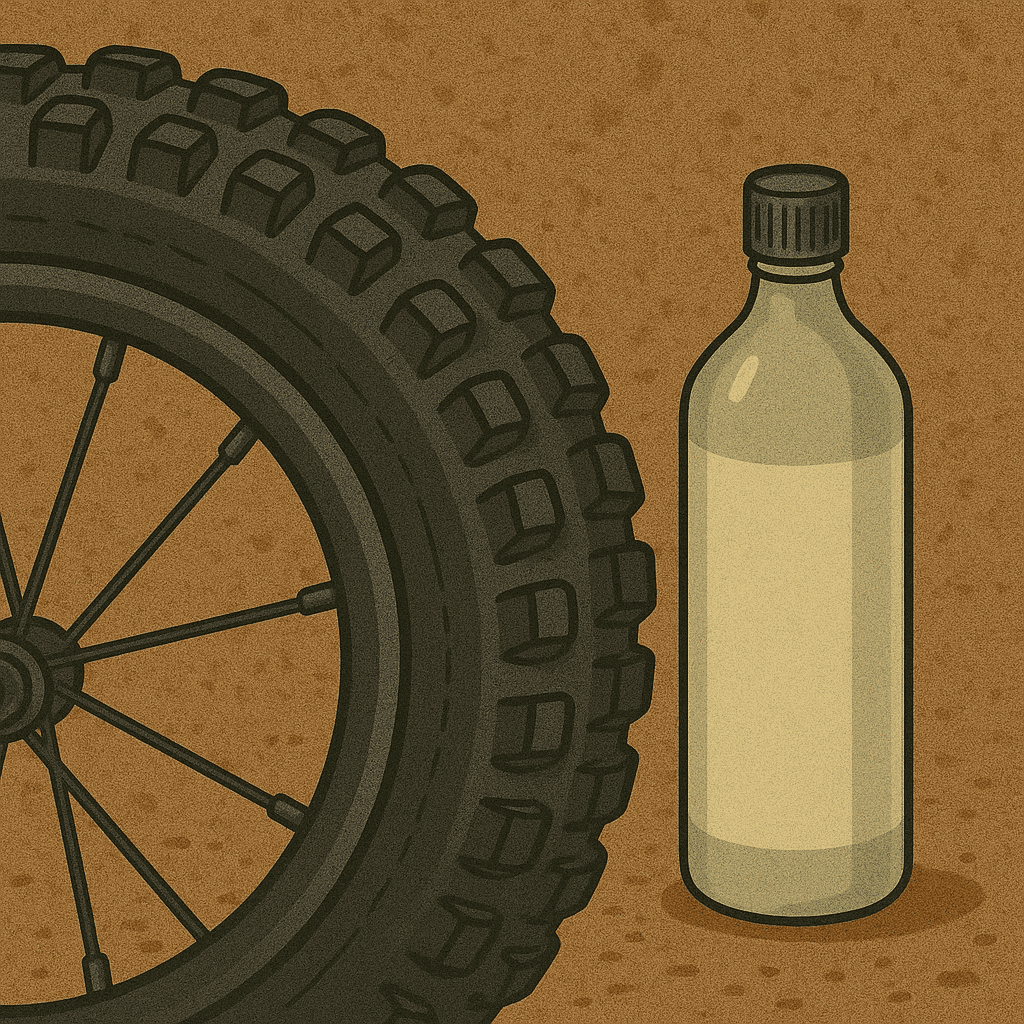
When I first heard the word tubeless I thought it sounded way too fancy for my budget bike. Turns out, it’s not as complicated as it seems. A tubeless setup simply means the tire itself holds the air—there’s no inner tube inside. Instead, the tire beads seal directly to the rim, and a liquid sealant inside plugs small punctures on the fly.
How Tubeless Works
To run tubeless, you need tubeless-ready rims and tires or a conversion kit. The rim is wrapped with airtight rim tape and a special valve is installed. After mounting the tire, you pour in a few ounces of sealant and inflate it with a floor pump or air compressor to seat the bead. The sealant sloshes around and fills any tiny gaps. It’s like magic when you hear those little pops as the bead locks into place.
Advantages of Tubeless
The biggest reason riders go tubeless is the ability to run lower PSI for more traction without worrying about pinch flats. I remember my first ride at 23 PSI on rocky singletrack, it feels similar to if I were using velcro compared to my current tube setup. Tubeless also tends to be lighter because you ditch the tube, and the sealant often stops small punctures before you even know they happened.
Frustrations and Lessons Learned
The first time I set one up I made a mess. Sealant everywhere—on my shoes, floor, even my dog. And seating the bead can be tough if you don’t have a strong pump or a compressor. You also need to top up sealant every few months; I’ve pulled tires apart after a season and found nothing but dried latex flakes. Still, once you get the hang of it, the payoff in grip and flat prevention is worth the occasional maintenance.
Tips for New Tubeless Riders
If you’re converting, buy quality rim tape and valves, and check that your tires are truly tubeless-ready. Start with pressures around 25–28 PSI and adjust based on your weight and terrain. And always carry a spare tube just in case—you can pop one in if a big cut defeats the sealant.
Key Differences at a Glance
Choosing between tubes and tubeless can feel like splitting hairs until you actually ride both. After a few seasons of experimenting, I’ve noticed some clear patterns.
Pressure and Traction
With tubes, I had to stay near 30–40 PSI to avoid pinch flats. Tubeless lets me drop into the low-20s for gnarly downhill trails, giving noticeably more grip on slick rocks and roots.
Weight and Rolling Resistance
Ditching the tube shaves a bit of weight and makes the wheel feel livelier. I don’t have lab numbers, but climbs felt a touch easier once I switched. Rolling resistance also improves when you can run lower pressure without squirm.
Cost and Maintenance
Tubes win on upfront cost—you can buy three or four for the price of a tubeless conversion kit. But long-term, tubeless saves money if you’re constantly fixing flats. Just remember sealant needs refreshing every few months.
Repair and Trail Fixes
Here’s where tubes shine. A spare tube and a pump will get you out of most jams. Tubeless punctures usually seal themselves, but a big sidewall cut means inserting a tube anyway.
Pros and Cons of Tubeless
Tubeless has a lot of hype, and most of it is deserved—but not all.
Pros
- Lower PSI for better grip and comfort.
- Self-sealing punctures save rides.
- Slight weight reduction compared to tubes.
Cons
- Higher initial cost (rim tape, valves, sealant).
- Messy setup and learning curve.
- Sealant dries out and needs regular maintenance.
Personal Take
After countless rides, I’d never go back for technical trails. The ability to run 22 PSI without fear of a pinch flat is a game changer. But I keep an extra tube and plug kit in my pack because a torn sidewall will ruin anyone’s day.
Pros and Cons of Tubes
Tubes may seem old school, but they still have their place.
Pros
- Cheap and available everywhere.
- Simple installation—no special tools or messy sealant.
- Easy to swap mid-ride if you flat.
Cons
- Higher pressures are required to avoid snakebite pinch flats.
- Less traction on loose terrain.
- Slightly heavier than tubeless.
Personal Take
For casual riders or anyone on a tight budget, tubes remain a solid option. I still run them on my commuter bike because convenience beats performance when I’m just riding to the grocery store.
Ideal Setups for Different Riders
Not every rider needs the same solution.
XC Racers
Cross-country racers love tubeless for lower rolling resistance and weight savings. I shaved almost a minute off a local 10-mile loop when I switched.
Enduro and Downhill
Tubeless is nearly essential here. Lower PSI provides the grip you need for aggressive descents.
Weekend Trail Riders
If you’re riding mellow singletrack once a month, tubes are cheaper and easier to maintain.
Bikepackers
This one’s tricky. Tubeless gives comfort on long days, but dried sealant on a multi-week trip can be a headache. I often carry a spare tube even when I start tubeless.
Maintenance and Long-Term Costs
This is the part many riders overlook.
Tubeless Upkeep
Sealant needs topping off every 2–4 months, depending on climate. I learned this the hard way when a mid-summer ride turned into a hiss-fest because my sealant had dried into rubbery flakes. Rim tape also wears out and should be replaced annually.
Tube Upkeep
Tubes are easier—just check pressure before rides and inspect for cracks every few months. A new tube costs only a few dollars.
Cost Reality
Over a year of regular riding, I’ve found the costs balance out. Tubeless saves money if you ride rough trails and would otherwise burn through tubes. If you ride only on smooth paths, tubes remain the cheapest long-term bet.
Conclusion
Whether you’re chasing podiums or casual weekend adventures, choosing between tubeless vs tube MTB comes down to your riding style, terrain, and budget. Tubeless shines with grip and puncture protection, while tubes keep things simple and affordable. Start with a wheelset you already own, experiment with pressures, and see which system keeps you smiling on the trail!