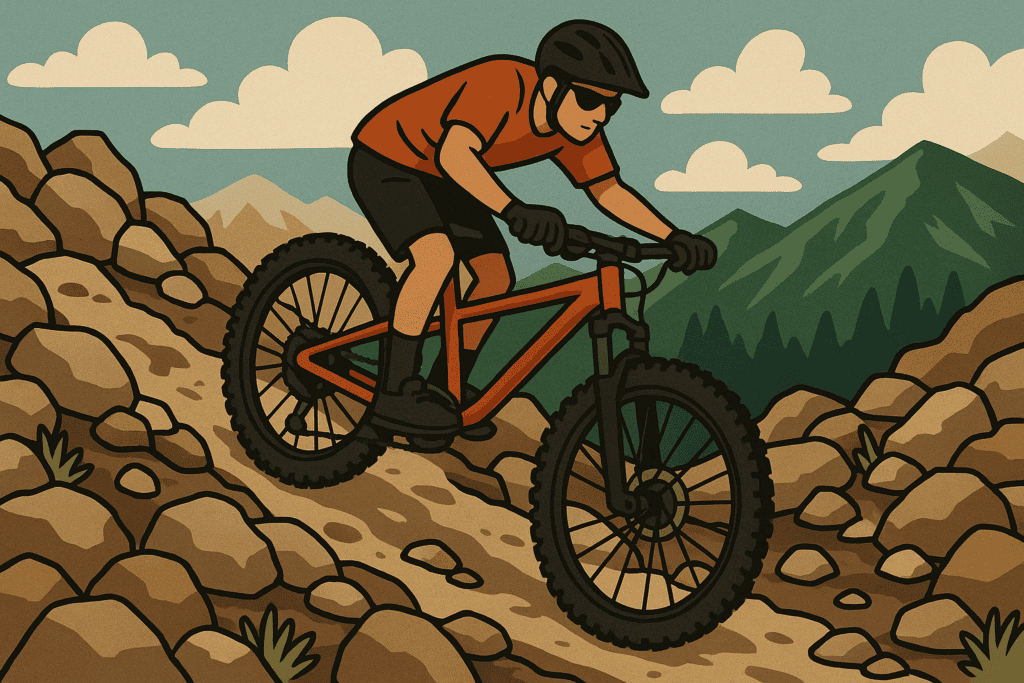
Mountain bike tires are something you may overlook, but it’s something you can make for control, speed, and reliability on the trail. The right tread, compound, casing, and pressure transform how your bike corners, climbs, and brakes is very crucial. This mountain bike tires guide explains what matters, how to choose the best MTB tires for your terrain and bike, and how to set them up for maximum performance.
Why Tires Matter in Mountain Biking
Tires determine grip, rolling speed, comfort, and puncture resistance, directly affecting confidence on technical terrain. A well-matched front and rear tire combo improves cornering support and braking control while maintaining efficient rolling.
Choosing the right tire for your discipline and terrain reduces flats, increases traction, and helps you ride faster with less effort. But fear not this guide makes it easy and you’ll figure it out for yourself what’s the best setup for how you ride, even if you need something like mountain biking tips for beginners.
FAQ:
How long do MTB tires last?
Tire life varies from 500–3,000+ km depending on compound softness, terrain abrasiveness, and casing protection. Front tires typically last longer because they experience less drive torque and braking skid. Replace when side knobs undercut or tear, center knobs square off deeply, or casings show damage.
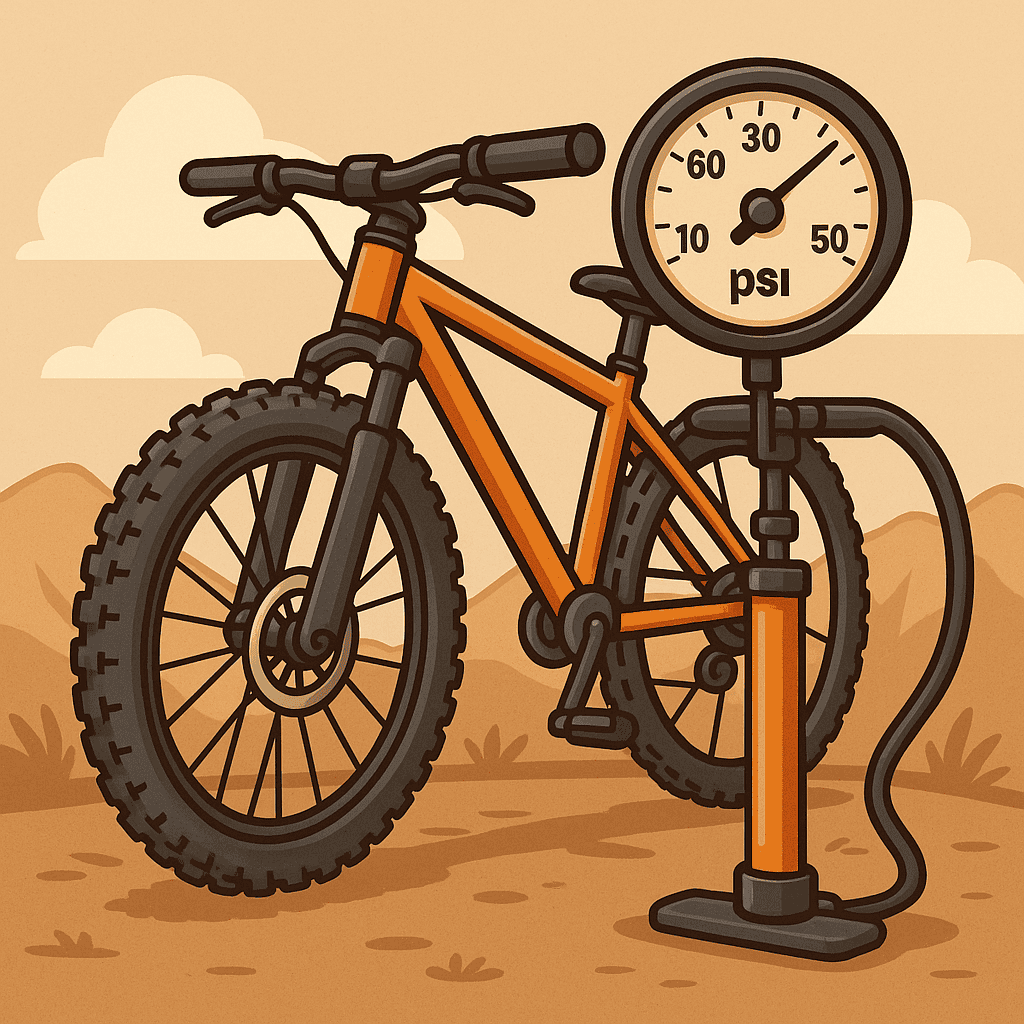
What pressure should I run for 29 x 2.4?
A common starting range is 19–24 psi front and 21–27 psi rear, adjusted for rider weight, casing, rim width, and inserts. Lighter riders and inserts allow the lower end, while heavier riders or lighter casings need the higher end. Test on your terrain and tweak by 1 psi to dial support and grip.
Can I mix front and rear tire models or brands?
Yes, mixing is common to balance grip and speed, such as a soft, aggressive front with a faster, harder rear. Focus on complementary tread transitions and similar volumes to maintain predictable handling. Ensure both are tubeless-ready and compatible with your rim width and pressures.
Tubeless vs tubes for beginners?
Tubeless has a steeper setup curve but delivers fewer flats, more grip, and better comfort once dialed. If starting with tubes, use robust casing tires and plan to switch to tubeless as skills and speed increase.
How often should I add sealant?
Top up every 2–4 months in hot, dry climates and 3–6 months in cooler, humid regions. Check by shaking the wheel or removing the valve core and using a dipstick to verify liquid. Add more after punctures, big rides, or storage periods.
What’s the widest tire my rim/frame can handle?
Match tire width to rim internal width guidelines and confirm frame and fork clearance with room for mud. As a rule, 25–30 mm rims suit 2.3–2.6 inch tires, but check manufacturer charts. Always verify ETRTO fit and measure actual inflated tire width, which can exceed labeled size.
Tire Anatomy Overview
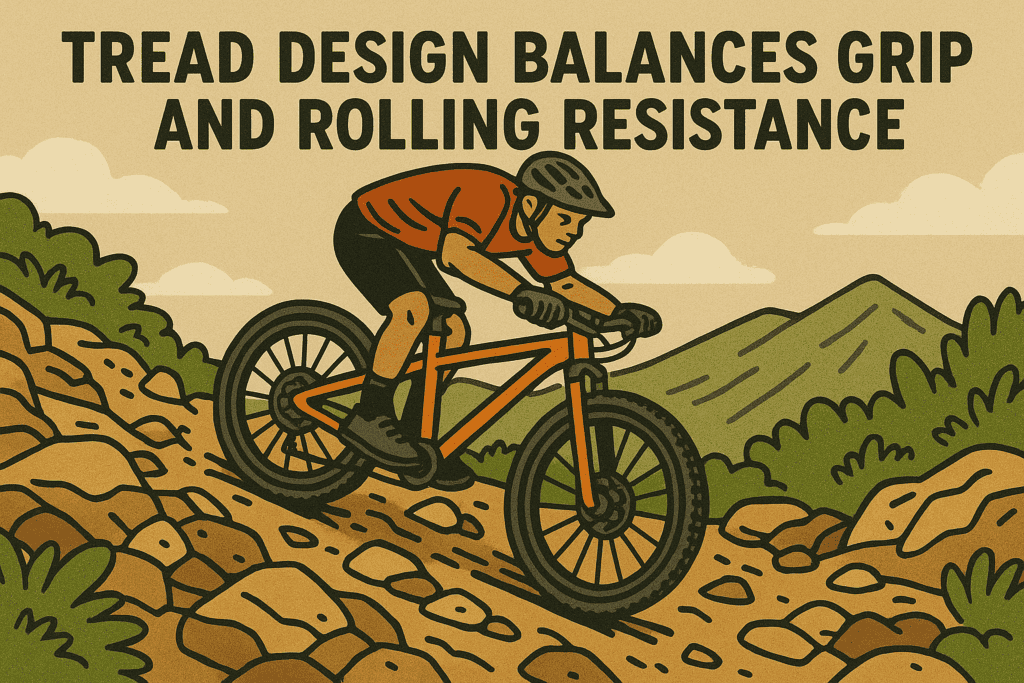
Tread and Knob Design
Tread design balances grip and rolling resistance through the shape and placement of center and shoulder knobs. Ramped or paddle-shaped center knobs roll quicker and brake better, while siping (fine cuts) improves conformity on roots and rocks. Open, deeper treads clear mud, whereas tighter patterns suit hardpack and dry conditions.
Rubber Compounds
Rubber compounds range from single to dual and triple blends, optimized to enhance grip and wear. Softer compounds increase traction and damping but wear faster and roll slower, making them ideal for front tires or wet terrain. Harder compounds last longer and roll faster, commonly used on rear tires or for dry XC racing.
Casing and TPI
Casing defines durability, support, and feel, with TPI (threads per inch) indicating fabric density. Higher TPI casings feel more supple and faster but are more cut-prone, while lower TPI options are tougher and more stable under load. Sidewall protection layers and inserts add puncture resistance and reduce burping at low pressures.
Here’s a site that goes more indepth on what casing is and how to think about it in practical use.
Bead Types and Hookless Compatibility
Wire beads are heavier and cheaper, while folding beads (Kevlar/aramid) are lighter and easier to mount. Most modern folding tires are tubeless-ready and compatible with hookless rims when used within manufacturer pressure limits. Always confirm hookless max pressure ratings and bead seat diameter before mounting.
ETRTO Sizing and Fit
ETRTO numbers standardize tire fit, showing width and bead seat diameter for accurate matching. For example, 60-622 indicates roughly a 2.35-inch tire on a 29-inch rim with a 622 mm bead seat. Match ETRTO to your rim and ensure adequate frame and fork clearance for safe operation.
Wheel and Tire Sizing
Diameters: 26, 27.5, 29
Overtime I noticed that 26-inch wheels are legacy but still used for dirt jump and smaller frames due to agility. The 27.5 size balances playfulness and rollover, popular for trail and enduro bikes. The 29 size offers the best rollover, traction, and momentum, dominating XC, trail, and enduro.
Widths by Category
XC widths typically run 2.1–2.4 inches for low weight and speed with adequate support on narrower rims. Trail and enduro tires often range 2.4–2.6 inches to balance grip, damping, and sidewall stability at lower pressures. Plus and fat categories use 2.6–3.0+ and 3.8–5.0 inches for float and traction in sand, snow, and loose terrain.
Rim Internal Width and Tire Shape
Rim internal width shapes the tire profile and supports under cornering loads. Narrow rims pinch tall profiles and reduce stability, while wider rims better support sidewalls and broaden the contact patch. Match tire width to rim width for optimal shape—e.g., 30 mm internal rims pair well with 2.4–2.6 inch tires.
Tire Types by Riding Discipline
XC/Marathon
XC tires prioritize low rolling resistance and light weight with faster center tread and moderate side knobs. Casings are lighter with minimal sidewall protection, and dual/triple compounds can fine-tune grip up front. Choose if you race, value acceleration, and ride mostly hardpack or light mixed terrain.
Trail/All-Mountain
Trail tires balance speed and grip for varied terrain, combining medium-aggressive tread with reinforced casings. They handle roots, rocks, and loam while remaining efficient on climbs. Choose 2.4–2.5 inch widths and tubeless setups for versatile performance.
I’ve also noticed Trail Bikes are the most common and I recommend them as the perfect all around bike!.

Enduro
Enduro tires emphasize traction, braking bite, and strong sidewalls for aggressive descending. Softer front compounds and reinforced or double-ply casings resist cuts and maintain stability at low pressures. Expect more weight but far better control and durability on steep, rocky trails.
Downhill
Downhill tires use dual-ply or DH casings with soft compounds and deep treads for maximum grip and protection. They resist pinch flats, support hard cornering, and withstand high-impact landings. Choose for bike-park riding, racing, and lift-access terrain where reliability trumps weight.
Dirt Jump/Park
Dirt jump tires are narrower, tougher, and often run at higher pressures for pump and pop. Treads are semi-slick or with small blocks for predictable dirt lips and wood ramps. Durability and sidewall strength matter more than wet-weather grip.
Fat Bike and Plus Bike
Fat and plus tires deliver float and traction on sand, snow, and loose surfaces at very low pressures. They rely on large volume for comfort and grip rather than deep lugs alone. Ensure rims and frames are designed for the increased width and volume.
e-MTB Specific Tires
E-MTB tires use reinforced casings, higher load ratings, and durable compounds to handle torque and weight. Treads often mirror enduro patterns with longer-wearing rubber to reduce premature wear. Check for e-bike certification and speed ratings for compliance and safety.
Tread Patterns by Terrain
Hardpack and Loose Over Hard
Tight center knobs with ramped profiles roll quickly and grip on sealed surfaces. Stouter shoulder blocks with siping improve edge hold in blown-out corners. Choose dual or triple compound for a fast center and grippy sides.
Loam and Mixed Conditions
Widely spaced, medium-height knobs bite into soft layers while resisting clogging. Consistent transition knobs help predictable lean angles on mixed terrain. Moderate casing protection and soft front compounds boost confidence.
Wet Roots and Rocks
Soft, slow-rebound compounds and heavily siped knobs conform to slick surfaces. Taller, supportive shoulder lugs improve off-camber traction and wet cornering. Use reinforced casings to prevent burps at the lower pressures needed for wet grip.
Mud-Specific
Tall, widely spaced paddles shed mud and dig for drive and braking. Narrower widths cut through slop and reduce clogging between stays. Expect slower rolling on hardpack but superior control in deep mud.
Snow and Sand Considerations
Lower pressures and larger volumes increase float and contact area on soft surfaces. Semi-paddle patterns or staggered blocks provide forward drive without excessive drag. Fat and plus tires shine here, but ensure rims and frames can handle the width.

Front vs Rear Tire Strategies
Pair an aggressive, softer front tire for cornering confidence with a faster, firmer rear for rolling efficiency and braking stability. Mixing brands and models is common to fine-tune bite, wear rate, and rolling speed across wheels. Rotate rear-to-front only if treads and wear patterns suit the new position, and monitor asymmetrical wear on rear drive edges.
Tire Pressure for Mountain Biking
Starting Points by Rider Weight and Volume
As a baseline, riders 60–75 kg might start around 19–22 psi front and 21–24 psi rear for 29 x 2.4 trail tires. Riders 75–90 kg often run 21–24 psi front and 23–27 psi rear, adjusting for casing and rim width. Larger volumes and inserts allow 1–3 psi lower, while lighter casings may require 1–2 psi higher.
Terrain and Weather Adjustments
Drop 1–3 psi for wet, rooty trails to increase conformity and grip. Add 1–2 psi for sharp rocks or high-speed berms to prevent burps and rim strikes. Hot weather raises pressure, so check before descending; cold lowers pressure, so compensate at the trailhead.
Measuring Accurately
Use a digital gauge or pump with a precise readout, as small pressure changes dramatically affect feel. Measure at riding temperature and recheck after trailhead warm-up laps. Be consistent with the same gauge to avoid cross-device variability.
Signs Your Pressure Is Too High or Low
Too high feels harsh, skips on chatter, and loses grip under braking and cornering. Too low feels vague in turns, burps in hard compressions, and shows rim strikes or snakebite marks. Aim for firm support in corners with supple compliance over chatter. you can only upgrade one element.
Setup and Installation Guide
Pre-Checks
Inspect rim tape for full coverage and airtight sealing, and confirm tubeless-ready labels if applicable. Verify tire rotational direction and match ETRTO sizing to the rim. Clean rim beds and lightly soap beads if needed for easier seating.
Mounting and Seating Beads
Install one bead, add sealant, then seat the second bead evenly around the rim. Use a booster or compressor to snap beads into place, bouncing and rotating the wheel to distribute sealant. Check for even seating lines all around both sides.
Adding Sealant and Inflating
Add sealant per volume guidelines, typically 60–120 ml per tire depending on size. Inflate above riding pressure to fully seal micro-leaks, then reduce to target psi. Spin and shake the wheel to coat sidewalls and bead seats.
Troubleshooting
For burps, increase pressure slightly, upgrade casing, or add inserts for sidewall support. For stubborn beads, re-tape the rim, remove valve cores to increase airflow, or use soapy water to reduce friction. For small leaks, add more sealant or apply a plug to punctures that won’t seal.
Conclusion and Next Steps
Choosing the right mountain bike tires starts with honest terrain assessment, realistic priorities, and proper sizing for your rims and frame. Dial your setup with tubeless, correct pressures, and the right casing and compounds for your riding style. Finalize your shortlist by category, test pressures in small increments, and maintain sealant and tread to keep performance high all season.