Most riders don’t lose speed because of fitness or technique — they lose it because their tire pressure is wrong.
I’ve watched riders spend thousands on bikes, suspension upgrades, and carbon wheels, only to sabotage all of it by guessing PSI in the parking lot. I used to do the same thing. Pump the tires until they feel “about right,” ride, and hope for the best. Sometimes it worked. Other times the bike felt harsh, sketchy, or slow, and I’d blame everything except tire pressure.
The truth is, the best mountain bike tire pressure depends on your weight, terrain, and setup, not what your buddy runs or what’s printed on the tire sidewall. That’s why this isn’t just another chart. This is the best mountain bike tire pressure chart I’ve put together, also helping get your cycling cadence up as a beginner to help you choose the right PSI confidently, compare setups, and stop second-guessing your bike on the trail.
Why This Is the Best Mountain Bike Tire Pressure Chart
I’ll be honest, for years I thought tire pressure charts were kind of useless. I’d look at one, shrug, pump my tires to whatever felt “about right,” and head out. Sometimes the ride felt amazing. Other times the bike felt like a jackhammer and I couldn’t figure out why. Same trail, same bike, totally different feel. That inconsistency was what finally pushed me to take tire pressure seriously.
The big mistake I kept making was assuming one PSI number could work everywhere. I remember running 26 PSI front and rear because someone at a trailhead told me that was the “sweet spot.” It worked on smooth hardpack, sure. But the moment I hit rocky singletrack, my hands were toast, the rear wheel was bouncing all over, and I even dinged a rim once. That sucked. And yeah, that repair bill hurt a little.
What makes this the best mountain bike tire pressure chart isn’t that it gives you one magic number. It’s that it helps you choose the right range based on how you actually ride. Over time, a few factors proved to matter more than anything else:
- Rider weight (more than I wanted to admit)
- Trail conditions (hardpack vs rocks vs loose)
- Tire setup (tubeless, casing strength, inserts)
Once I stopped chasing exact PSI numbers and started working within ranges, everything got easier. Less second-guessing. Fewer mid-ride stops. Better grip without sacrificing support.
Another lesson I learned the hard way is that front and rear tire pressure shouldn’t usually match. I used to keep them equal because it felt “balanced.” In reality, my front tire needed to be softer for grip and confidence, while the rear needed more pressure to deal with braking forces and square-edge hits. Splitting those pressures was one of those quiet upgrades that made the bike feel calmer everywhere.
Trail conditions also play a bigger role than most charts admit. Hardpack, loose-over-hard, rocks, roots, mud — they all change how a tire interacts with the ground. I used to drop pressure aggressively in wet conditions, thinking more grip was always better. Turns out that was wrong. Slightly higher PSI with better casing support worked far more consistently, especially on slick roots and off-camber sections.
Tubeless setups are another reason generic charts fail. When I finally went tubeless, I kept running tube-level PSI out of habit. Big mistake. Tubeless lets you run lower pressure safely, but only within limits. Push it too far, and you’ll burp air mid-corner, which is not a fun learning experience. This chart accounts for that reality instead of pretendingthat lower is always better.
At the end of the day, this mountain bike tire pressure chart is meant to save you time, frustration, and bad rides. It’s the chart I wish I had years ago, before I wasted so many rides fiddling trailside and second-guessing my setup. Start with the recommended ranges, make small adjustments, and let the trail tell you the rest. When tire pressure is right, everything else just works better — and yeah, it feels pretty damn good when it finally clicks.
Best MTB Tire Pressure by Rider Weight
Rider weight was the variable I ignored the longest, mostly because I didn’t want to deal with it. PSI felt like it should be universal. Pump the tires, ride, done. That idea held up right until I started riding regularly with people who weighed quite a bit less than me and somehow had way more grip on the same trails. Same tires. Same terrain. Totally different results. That’s when it finally clicked that weight wasn’t a footnote — it was a foundation.
The first time I actually adjusted tire pressure based on rider weight, the change was immediate. The bike felt calmer, less deflective, and more predictable through rough sections. I remember thinking it almost felt slower at first, but then realizing I was carrying way more speed because I wasn’t fighting the bike. That’s a pattern I’ve seen over and over since. When pressure matches load, everything just works better.
What most tire pressure charts get wrong is treating rider weight as a single cutoff instead of a range. A 150-lb rider and a 200-lb rider running the same PSI are not experiencing the same tire behavior. One gets compliance and grip. The other gets rim strikes, harsh feedback, and vague handling. I’ve been on both sides of that equation, and neither is fun when it’s wrong.
Another mistake I made early on was ignoring riding gear. Pack, water, tools, food — it all adds up, especially on longer rides. That extra weight ends up mostly over the rear wheel, which means rear tire pressure needs to reflect riding weight, not just what the scale says at home. Once I started accounting for that, rear-wheel issues dropped way off.
This chart uses rider weight ranges instead of exact PSI prescriptions because riding style matters too. Aggressive riders who push hard into corners usually need a bit more pressure than smoother riders at the same weight. Weight sets the baseline, but how you ride fine-tunes the decision. That’s why this chart helps you choose a starting range instead of locking you into a single number.
Front and rear pressure splits become even more important as rider weight increases. Heavier riders almost always benefit from higher rear PSI for rim protection, while still keeping the front slightly softer for grip. Once I stopped trying to “balance” pressures and started loading each tire appropriately, the bike felt more planted everywhere.
If there’s one takeaway here, it’s this: rider weight isn’t optional information. It’s one of the first decisions you should make when using a mountain bike tire pressure chart. Get this right, and every other adjustment — terrain, casing, tubeless setup — becomes easier and more consistent.
Best Tire Pressure for Different MTB Trail Conditions
Trail conditions were the thing that finally forced me to stop treating tire pressure like a one-time setup. I used to pump my tires at home, toss the bike in the car, and ride whatever showed up. Hardpack, rocks, loose sand, wet roots — didn’t matter. Same PSI every time. Some days the bike felt great. Other days it felt sketchy and slow, and I’d blame my legs or the trail instead of the setup.
Hardpack trails were the first place pressure really clicked for me. With lower PSI, the bike felt draggy and vague, like the tires were folding slightly instead of rolling. I kept thinking I was tired or undertrained. Once I bumped pressure up a couple PSI, the bike held speed better and felt more precise in corners. Same trail, same effort, better result. That’s when I realized higher pressure isn’t “worse” — it’s just better for certain conditions.
Rocky and rooty trails taught the opposite lesson. Running too much pressure made the bike ping off everything. The tires felt like they were bouncing instead of gripping, and my hands paid the price. Dropping PSI slightly let the tire deform and absorb hits instead of deflecting. The bike tracked better, braking felt calmer, and I stopped feeling like every rock was trying to throw me offline.
Loose-over-hard was trickier. I went through a phase of dropping pressure way too low because I thought more compliance automatically meant more grip. What actually happened was vague handling. The tire felt like it was floating instead of biting. What worked better was a slightly firmer pressure paired with a supportive casing, letting the tread cut through loose material and hook up underneath. That took a few near washouts to learn, honestly.
Wet trails were another pressure trap. I used to drop PSI aggressively thinking it would magically create traction. Sometimes it helped. Other times the tire felt unpredictable, especially on slick roots and off-camber sections. What worked more consistently was making small changes — one or two PSI — instead of drastic drops. Controlled pressure plus good casing support beat “as low as possible” every time.
This is why the best mountain bike tire pressure chart breaks pressure down by terrain instead of pretending one setup works everywhere. Trail conditions change how your tires interact with the ground. The goal isn’t maximum softness or maximum speed. It’s balance — grip when you need it, support when it matters, and fewer moments where the bike feels like it’s fighting you.
Best Front vs Rear MTB Tire Pressure Setup
For a long time, I ran the same tire pressure front and rear because it felt neat and logical. Same tires, same PSI, problem solved. On the trail though, the bike never quite felt settled. Corners felt sketchy, braking felt harsh, and I was always making little corrections instead of just trusting the bike. It took me way too long to realize the problem wasn’t the tires — it was how I was pressurizing them.
The front tire’s job is grip and control. The rear tire’s job is support, drive, and rim protection. Treating them the same ignores what they actually do. The first time I dropped the front pressure by a couple PSI and left the rear slightly higher, the difference was obvious. The front tire stopped skittering in corners and started biting. I could lean the bike without that “about to wash” feeling, which is huge for confidence.
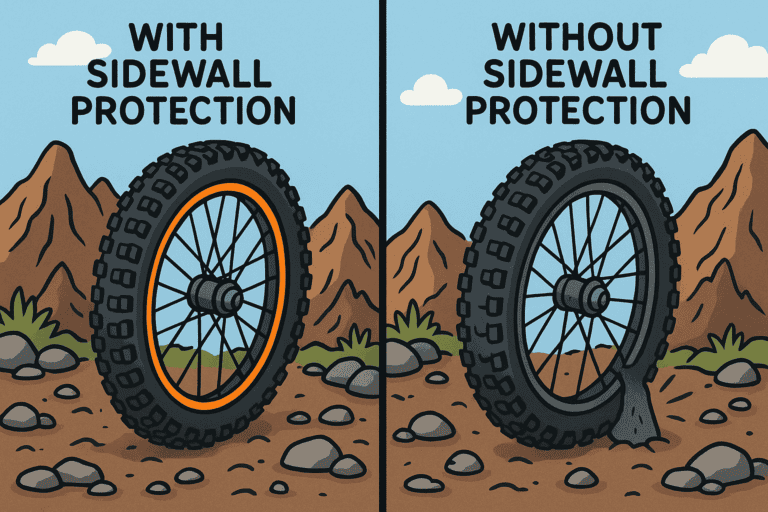
Rear tire pressure is where mistakes usually get expensive. I’ve run it too low plenty of times, mostly chasing comfort. The result was rim strikes, vague climbing traction, and once, a sidewall cut that ended the ride early. Bumping rear PSI up just a bit made the bike feel faster and more controlled, especially on technical climbs and hard braking zones. It wasn’t harsher either — it was just more supportive.
Front pressure is more sensitive than most riders expect. One PSI too much and the tire feels pingy and nervous. One PSI too little and it starts to feel floppy, especially at speed. That’s why small changes matter so much here. I’ve had rides where a single PSI adjustment up front completely changed how confident I felt descending. Those are the adjustments that stick with you.
As rider weight and speed increase, splitting front and rear pressure becomes even more important. Heavier riders almost always benefit from higher rear pressure for durability, while still keeping the front lower for grip. Lighter or smoother riders can sometimes run closer pressures, but even then, equal PSI is rarely the best option.
This is why the best mountain bike tire pressure chart treats front and rear as two separate decisions. Once you stop chasing symmetry and start tuning each tire for its role, the bike feels calmer, more predictable, and way easier to ride fast.
Best MTB Tire Pressure for Tubeless vs Tubed Tires
Switching from tubes to tubeless was one of those changes that quietly rewired how I thought about tire pressure. Back when I ran tubes, I was always riding a little tense. Not because the trails were scary, but because pinch flats were always in the back of my mind. That fear pushed me to run higher PSI than I probably should have, especially in rocky terrain. The bike felt harsh, grip was inconsistent, and I just assumed that was the tradeoff.
When I finally went tubeless, I made the opposite mistake. I dropped pressure way too much right out of the gate. Everyone said tubeless meant “lower PSI,” so I took that literally. First hard corner, the tire squirmed, then came that unmistakable hiss as air burped out. No full flat, but enough to kill confidence instantly. That’s when I learned tubeless doesn’t mean ignore pressure limits. It just means you get a wider, more forgiving range.
The real advantage of tubeless is that the tire can deform more naturally without the risk of pinch flats. That usually means running a few PSI lower than a tubed setup, especially up front. Grip improves, trail chatter drops, and the bike feels more planted. But casing strength suddenly matters a lot more. Lightweight XC tires tubeless still need respect. Heavier trail and enduro casings let you push lower without things getting weird.
Tubes still make sense in certain situations, even if they’re less popular now. Smooth trails, budget builds, or riders who just don’t want to deal with sealant mess — tubes can work fine. They just demand higher PSI to stay reliable. The downside is less grip and more feedback through the bike. If you’re constantly fighting traction on a tubed setup, that’s not a skill issue. That’s physics.
Tire inserts changed the equation again. I didn’t think I needed them until I dented a rim running low tubeless pressure on sharp rocks. Inserts let you run lower PSI with more support, but they also change how the tire feels. More damping, less squirm, slightly heavier. Not better or worse — just different. The key is knowing what you’re trading.
This is why the best mountain bike tire pressure chart separates tubeless and tubed recommendations instead of lumping them together. The “best” pressure depends on what’s inside the tire just as much as what’s under it. Once I started treating tubeless, tubed, and insert setups as different systems, pressure decisions got way easier and rides got a lot more consistent.
How to Dial In Your Best Mountain Bike Tire Pressure
This is the part most riders rush, and I get it. You want the “right number,” pump the tires, and ride. I used to think that way too. What finally changed my approach was realizing tire pressure works a lot like suspension setup. You don’t set sag once and never touch it again. You revisit it, especially when conditions change.
The biggest mistake I made early on was changing too much at once. I’d drop three PSI, hate how the bike felt, then add four back and hate that even more. Total guesswork. Once I committed to adjusting in one-PSI steps, everything became clearer. I could actually feel what changed instead of wondering if it was all in my head. Grip improved, harshness faded, and the bike stopped doing unpredictable things mid-corner.
Trail feedback is the real guide here. If the bike feels pingy, harsh, or like it’s bouncing off rocks, pressure is usually too high. If it feels vague, floppy, or unstable in corners, pressure is probably too low. Rim strikes are the obvious warning sign that you’ve gone too far. I ignored those signals longer than I should have, mostly because I didn’t want to stop and grab a pump. That always ended up costing more time later.
Another thing I learned is how often pressure actually changes. Temperature, elevation, and even how long the bike’s been sitting can shift PSI more than most people think. I’ve started rides convinced my setup was perfect, only to realize I was a couple PSI low because it was colder than the last ride. Now I check before every ride. It takes seconds and saves frustration.
What really made tire pressure click for me was treating it like a performance decision instead of a chore. Once PSI is dialed, everything else works better. Suspension feels smoother. Braking feels controlled. Cornering feels predictable. The bike stops fighting you and starts doing what you want.
That’s the real value of using the best mountain bike tire pressure chart. It gives you a smart starting point, but dialing it in is what turns good advice into a great setup. Make small changes, pay attention to how the bike responds, and don’t be afraid to adjust when conditions change. When tire pressure is right, riding feels easier — and honestly, a lot more fun.
Choosing the Best Mountain Bike Tire Pressure
Tire pressure is one of those things that looks small on paper but changes everything on the trail. I used to treat it like an afterthought something you set once and forget. Over time, it became obvious that PSI decisions were quietly shaping every ride, for better or worse.
The reason this best mountain bike tire pressure chart exists isn’t to give you a single “correct” number. It’s to help you make smarter choices. Rider weight, terrain, tire setup, and riding style all push pressure in different directions. Once you understand how those pieces fit together, tire pressure stops feeling confusing and starts feeling controllable.
The biggest win for me wasn’t more grip or fewer rim strikes, although both happened. It was confidence. When the bike feels planted and predictable, you ride looser. You brake later. You corner harder. You stop fighting the trail and start flowing with it. That’s what dialing in tire pressure actually gives you.
Use this chart as your baseline. Come back to it when the seasons change, when you swap tires, or when trails dry out or get sloppy. Make small adjustments. Pay attention to feedback. Over time, you’ll stop guessing and start knowing when your pressure is right.
And when that happens, everything else on the bike just works better.