Did you know over half of cyclist fatalities occur at dusk, dawn, or night? To call myself a night biker is an understatement to the amount of times I’ve come from the airport on bike, school, logging hundreds of miles after sunset, I’ve learned that visibility isn’t just about safety—it’s about survival! Personally I love night riding as a great hobby and it offers a peaceful escape from daytime traffic and summer heat, but you can never count out the consequences that come with night riding. I still remember my first close call when I chose night to do a store-run to Aldi’s thus riding on the sidewalk and my back tire being pushed by the “entitled driver” behind me in their Porsche despite my bright light setup. That terrifying moment transformed how I approach night cycling forever. In this comprehensive guide, I’ll share expert visibility techniques that have kept me safe through years of urban night riding. Whether you’re commuting home after work or enjoying the scenery of evening rides, this expert visibility guide for cyclists will help you stay visible and secure when darkness falls.
Essential Night Cycling Visibility Gear
I still recall when I moved to my first apartment and started biking at night. There I was, heading home from a grocery trip, just after sunset with nothing but reflectors that came with my bike, so pretty much useless. Talk about a wake-up call! A car crossed me on the driveway and nearly pushed my car into the street, and he had to go all the way to actually look at me to stop – the driver probably didn’t even see me until the last second.
After that scary experience, I went on a mission to figure out what it means for me to have some level of “night cycling safety”. What I discovered changed the way I approach night riding forever. There’s a massive difference between seeing where you’re going and being seen by others. Both are super important, but for completely different reasons.
Let me tell you something that might surprise you – the legal minimum requirements for bike lights are laughably inadequate in most places and even considered they’re not enforced. All that’s required is a front white light visible from 500 feet and a red rear reflector which is 99% universal in the United States. That’s barely enough to keep you legal, nowhere near enough to keep you safe. I learned this the hard way when I got caught in not just darkness, but also rain in my “legally compliant” setup.
Now most bikes don’t even come with an actual bike light that has LEDs, however but when it does and that one light fails (and you probably don’t even have a rear,) you’re suddenly invisible to traffic. I make sure to charge my lights every single time I ride at this point. Some might call it overkill, but I call it insurance.
For a beginner, you can find a cheap light setup that will keep you safer than any default riding lights that will suit your ride. I personally have an amazon light that not just comes with the bright light itself and lighting options on the front, but it also comes with a horn that will make a loud noise in-case I need to warn any vehicle traffic that I am here.
The biggest lesson I’ve learned over years of night riding? Redundancy saves lives. An extra $20 light might seem unnecessary until your main light dies three miles from home on a moonless night. Trust me on this one; I’ve been there, and it’s never fun trying to navigate dark streets with just the flashlight on your phone.
Strategic Light Placement to Maximize Visibility
For a beginner it can seem great to just leave a light on your handle bars, but guess what… Most drivers aren’t going to be looking ahead at your bike or behind but at your head. Boy, was I wrong! It’s too often I hear drivers talk about how they couldn’t see a bike with a large setup of bags, reflectors and the basic lighting, however it should be enough right?
Here’s something they don’t tell you when you buy bike lights – there’s actual science behind effective placement. I’ve come to view my bike as having several critical “visibility zones” that need coverage. The most obvious are front and rear, but what about your sides? Intersections are danger zones because vehicles approach from multiple angles. After teaching night cycling workshops for years, I’ve found that side visibility is the most neglected aspect of most riders’ setups.
Helmet-mounted lights were a game-changer for me. I nearly resisted because how goofy it looked (it did,) but the safety advantage is undeniable. When I turn my head to look at a car, my light points directly at them – it’s like making eye contact with light. Plus, a helmet light follows your gaze when you’re looking for hazards, unlike fixed lights. The first time a driver put their hand up because of my helmet light, I became a convert.
The height difference between lights creates a more three-dimensional presence on the road. Low-mounted lights (like on your wheel hubs or lower fork) create a ground effect that catches attention, while higher lights (handlebars, helmet) are at driver eye level.
Weather conditions change everything about visibility. What works on a clear night might be nearly useless in fog or rain. I learned this lesson the hard way during an unexpected downpour when my regular lights seemed to disappear in the glare and road spray. Now I adjust my light positioning and intensity based on conditions, using more lights and different angles in bad weather.
If you’re just starting to upgrade your visibility, focus first on creating a distinctive light pattern that separates you from other road objects. Even with limited budget, strategic placement of basic lights can be more effective than poorly positioned expensive ones. Trust me – the extra few minutes spent optimizing your light setup could literally save your life. Like, I even have a headband with a light on it which I can change the direction of the light to shine, protecting the side necessary.
I used to think slapping a light on my handlebars and one on my seat post was good enough for night riding. Boy, was I wrong! It wasn’t until a close call with a car at an intersection that I realized how much light placement actually matters. The driver claimed he never saw me, despite my “properly equipped” bike. That’s when I fell down the rabbit hole of light positioning science.
I’ve come to view my bike as having several critical “visibility zones” that need coverage. The most obvious are front and rear, but what about your sides? Intersections are danger zones because vehicles approach from multiple angles.
Advanced Night Visibility Tactics Beyond Basic Equipment
I’ll never forget the night I learned that all the fancy gear in the world can’t save you if you don’t know how to use it strategically. I was coming home from a night ride with my full setup – multiple lights, reflective everything – when a car still nearly clipped me at a weird intersection. That was my wake-up call that equipment alone isn’t enough.
Route planning completely changed my approach to night riding. I used to take the same routes day or night until I realized certain roads that are fine during the day become death traps after dark, especially here in Florida where lighting is terrible! Now I specifically map routes with better street lighting, wider shoulders, or lower traffic volumes for night rides, best if you have a good trail, (hopefully with lights.) Sometimes this means my commute is a half-mile longer, but arriving safely is worth those extra few minutes.
Positioning yourself correctly on the road might be even more important than what lights you’re running. I learned through years of night commuting that riding too far to the right actually makes you less visible at night and encourages dangerous close passes. Taking a more assertive lane position, especially approaching intersections, forces drivers to see you and properly navigate around you. The first time I tried this, I was nervous, but the difference in driver behavior was immediate and obvious. I promise you will get the hang of it.
Night riding comes with specific hazards that require special attention. Drunk drivers are more common, driver fatigue is worse, and depth perception is compromised. After some scary close calls, I developed a habit of glancing back much more frequently after dark, watching for telltale signs like erratic speed changes or drifting within lanes. This habit has saved me more than once from potential disasters.
Intersections become particularly tricky visibility challenges after dark. My technique evolved after watching how motorcycle riders handle the same situations. I now slightly weave within my lane, (always be careful with this) when approaching major intersections to create movement that catches attention. Some might think it looks silly, but the human eye naturally tracks this type of movement, it’s directly saved my butt multiple times.
The mental aspects of night riding are just as important as the physical setup. I’ve found that assuming I’m invisible and riding accordingly keeps me safer than relying on my visibility gear. This mindset shift means I’m always planning escape routes, watching for door zones more carefully, and generally staying more alert. The lights and reflective gear are my backup, not my primary protection strategy.
Common Night Visibility Mistakes and How to Avoid Them
I cringe every time I see someone riding at night with just those little plastic reflectors that came with their bike. Been there, done that, and learned my lesson the hard way. The truth is, reflectors only work when light hits them directly, and by then, it might be too late. Early in my cycling days, I thought those wheel reflectors and the little red one under my seat were “good enough” until a driver rolled through a stop sign and told me they never saw me until the last second.
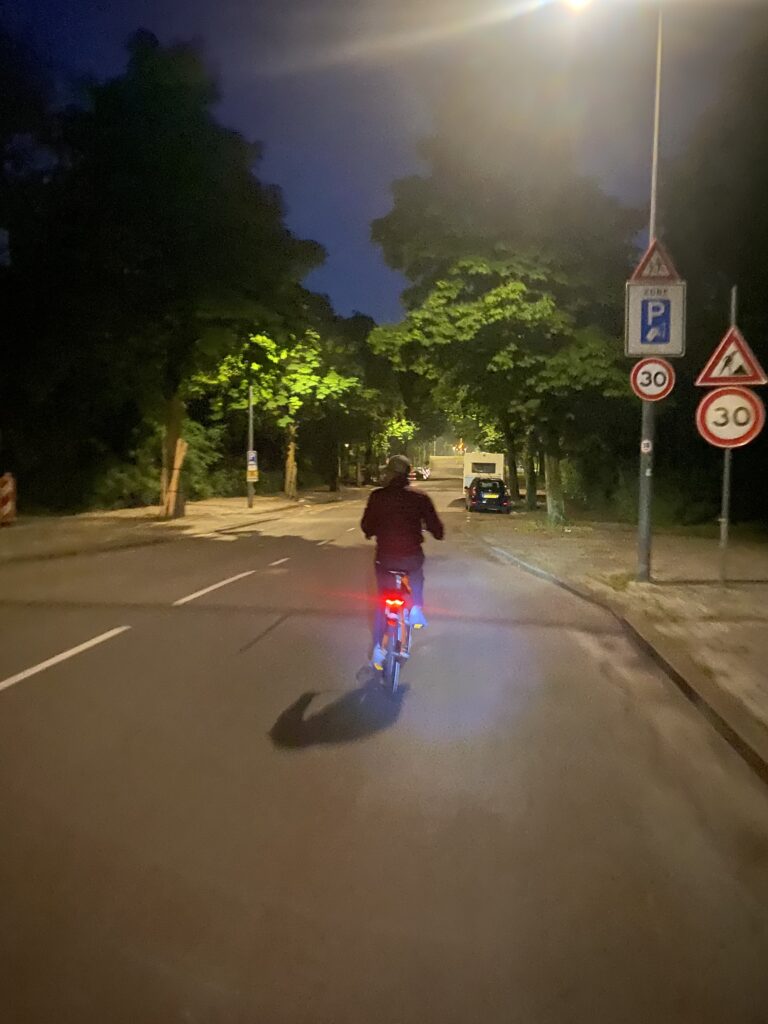
Dark clothing is basically an invisibility cloak after sunset, even with a decent light. I remember feeling pretty cool in my all-black cycling gear with just my single handlebar light. That feeling disappeared quick when my buddy drove behind me one night and was following me on the way to my apartment, pointing out how he could almost not see me when the streetlamps went out. The contrast between your lights and clothing matters tremendously. Now if I know I’m going to be out late, I wear reflective clothing, even if it’s just a vest over my regular gear.
Light angles can make or break your visibility setup. I spent good money on a super bright light only to mount it pointing slightly upward. Sure, I could see far ahead, but I was also unintentionally blinding everyone coming toward me. What’s worse, the improper angle meant the light wasn’t illuminating the road where I needed it most. After adjusting it downward, I not only stopped getting high beams flashed at me in anger, but I could actually see potholes before hitting them!
Riding alongside parked cars creates a special kind of visibility problem that took me years to fully understand. It’s not just about watching for opening doors; it’s about how the row of cars creates a visual oddity that almost makes you blend in. I noticed cars passing me much closer on streets with parked cars until I started positioning my lights to stand out from this background clutter. Placing one light lower than handlebar height made a dramatic difference in how visible I was in these situations.
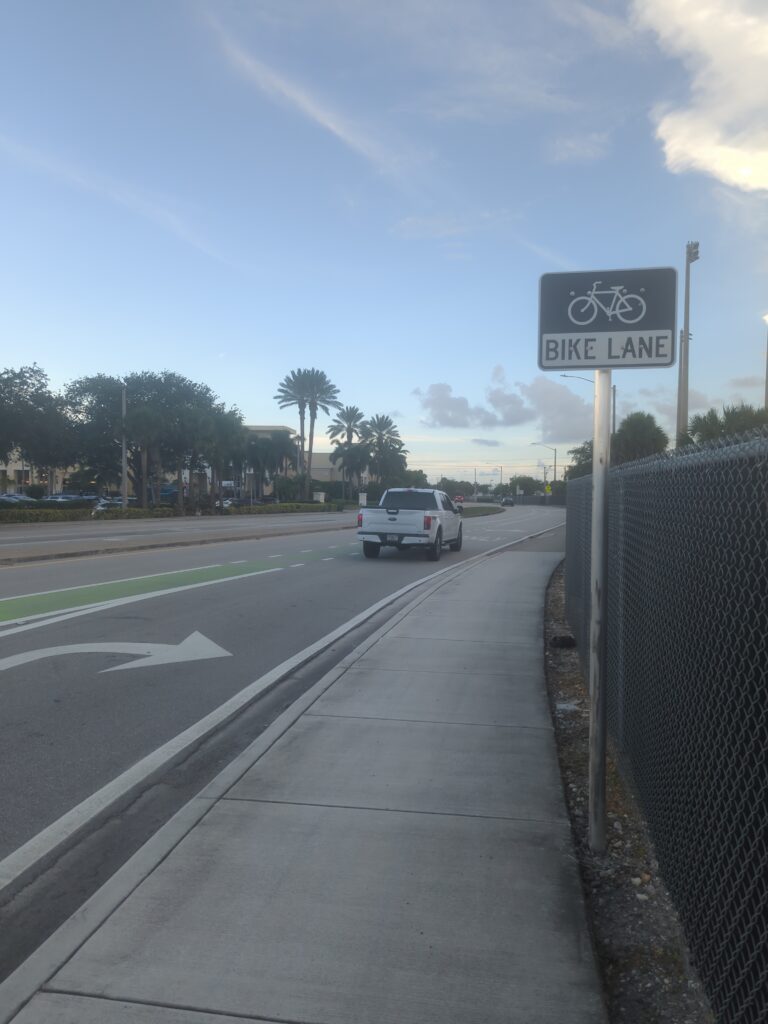
The false security of bike lanes at night is something I learned about through experience. Just because there’s a painted line doesn’t mean drivers can see you any better. I used to relax more in bike lanes until realizing they sometimes put you right in the “door zone” of parked cars or hide you in drivers’ blind spots at intersections. Now I maintain the same vigilance regardless of lane markings and often use additional side-facing lights when riding in bike lanes at night.
If you’re making any of these mistakes, don’t feel bad – we’ve all been there. The important thing is continually evaluating and improving your setup. Even small changes to light positioning, clothing choices, or riding habits can dramatically increase your chances of making it home safely after dark. Trust me, those few extra minutes of preparation are worth every second.
Customizing Your Night Visibility System for Different Environments
I learned pretty quickly that a one-size-fits-all approach to night visibility is a recipe for disaster. My first setup worked okay in my quiet neighborhood but left me practically invisible when I ventured onto busier roads, note that in a less going-on area the roads are wider and sidewalks are skinnier. It took some close calls and a lot of trial and error before I figured out how to adapt my system for different riding environments.
Urban riding versus rural conditions require completely different visibility strategies. In the city, I found that competing with bright storefronts, street lights, and traffic signals meant I needed lights with distinctive flash patterns to stand out from the visual noise. But when I took that same flashy setup to more suburban roads, the rapid blinking actually made it harder for drivers to judge my distance and speed. Now I use steady, powerful beams in rural areas and save the attention-grabbing patterns for more busy streets in-which drivers already have to pay attention to 100 things at once.
The bike path near my house seemed like a safer alternative until I realized it had its own unique visibility challenges. Without car headlights illuminating reflective gear, other cyclists and pedestrians couldn’t see me until we were almost on top of each other. After a few near-misses with nighttime joggers, I started using a lower-powered, wide-angle light specifically angled to illuminate the path several feet ahead without blinding oncoming trail users. This small adjustment made a world of difference in how people responded to my presence.
Rainy nights used to keep me off the bike entirely until I figured out how to modify my setup. Standard lights create this weird glare effect on wet pavement that actually reduces visibility. I discovered that mounting a secondary light lower on my fork cast fewer reflections and better illuminated the road surface. Don’t ever forget about your yellow lights, they probably are on your bike and they make you seen in the rain! Turns out they actually penetrate rain and mist better than standard white lights. Game changer for wet weather riding!
The contrast between riding through poorly lit neighborhoods versus downtown areas with bright street lights taught me about adaptability. In the darker areas, I needed powerful lights to see the road, but in well-lit sections, those same lights were overkill and sometimes created glare issues. I started using programmable lights with multiple brightness settings that I could adjust on the fly depending on the ambient lighting conditions. This meant I always had appropriate illumination without wasting battery or blinding others.
One thing I didn’t anticipate was how much my riding position needed to change in different environments. On quieter streets, I could maintain a comfortable position, but in heavier traffic areas, I learned to ride more upright to maximize the visibility of my lights and reflective gear. This sometimes meant sacrificing a bit of speed and efficiency, but the improved visibility to drivers more than made up for it. So yeah usually I would stand up more often during the night to be seen.
The seasonal changes in daylight caught me off guard my first year of serious riding. One week I was finishing my rides within the evening with shine left over, and suddenly I was riding home in complete darkness. I started preparing for these transitions by keeping my full lighting setup ready earlier in the season than seemed necessary. Better to have it and not need it than to be caught under-equipped when sunset times suddenly shift.
Over years of riding in all kinds of conditions, I’ve learned that visibility isn’t just about having the right gear—it’s about using it intelligently based on where and when you’re riding. What works perfectly in one environment might be inadequate or even problematic in another. The willingness to adapt and customize your approach could be the difference between a close call and a safe ride home.
Conclusion:
Night cycling offers an incredible opportunity to enjoy quieter roads and cooler temperatures, but only when you take visibility seriously. I’ve gone from being that nearly-invisible rider to someone drivers comment on for being “impossible to miss,” so much so they almost hate it which means I’m still here typing this article :).
Remember that being seen while biking at night is an active process that requires thoughtful equipment choices, strategic positioning, and consistent awareness. Don’t settle for the minimum requirements; invest in a comprehensive visibility system that addresses all the angles and scenarios we’ve covered. Your safety is worth it!
I’d love to hear about your own night riding experiences and visibility solutions in the comments below. What visibility techniques have worked best for you? Share your insights and let’s help each other stay visible and safe biking around our very own areas.